Are you wondering how to maximize your wireless network installation services? This can be tricky, but with these twelve simple steps, we will have you up and going in no time. Approaching something new can be daunting, but we are confident that if you follow this procedure you will definitely maximize your wireless network installation services.
What is a wireless network?
Before understanding how to maximize your wireless network installation services, one should know what a wireless network is! A computer network that uses wireless data connections between the network nodes is known as a wireless network. You will have heard about the wireless network, but may not have realized what it actually is. Here, we are going to give you a small summary to clarify what a wireless network is, and what it does.
Wireless networking is one of the common methods that is used by a telecommunications network, business installations, and home computer network installations. This avoids the costly process of installing physical cables into a building. This method also provides a connection between various equipment locations. Admin telecommunications networks are administered and implemented radio communication. Some common examples of wireless networks include; wireless sensor networks, cell phone networks, satellite communication networks, and Wireless Network Connection (Wi-Fi).
Here we are going to talk about setting up the wireless network connection (Wi-Fi), so that you have an idea about how to maximize your wireless network installation services in just 12 steps.
- Install the router
First, and most important step to remember is that when you go for home computer network installation, you need to install a router immediately. There are many factors which will help you to choose the best router when it comes to wireless network installation service in your place. Always get the help of a local technician and then install the router accordingly.
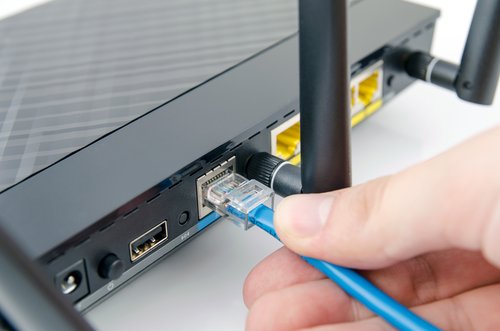
- Connect the router to the modem
The next step is to connect the router to the modem. The router needs to be switched on properly, and the modem connected to the router using a standard Ethernet cable.
3.Connect a computer via ethernet cable
This step is not vital, but it can be useful when it comes to home computer network installation. All you need to do is to set up the wireless router by connecting it to your computer through a physical cable; this will allow you to complete the installation process without losing any internet connection with the router.
4.Install the router software
If you don’t know much about routers, then it is okay because not everyone does. But in many cases, a router does not come with software, so we recommend that you buy a router with pre-installed software.
- Open the router’s configuration page
Once you have set up your router and the router software, now all you need to do is open the router’s configuration page. Once you have opened the configuration page, you need to enter the web address of the router and complete the next procedure. This is typically 192.168.1.1 or 192.168.0.1 If this is all too much for you, you can always contact us for the help of a computer technician.
- Enter your internet connection information
This is an essential step that cannot be missed. You need to enter the internet connection information; that includes the DNS information and the IP address with the help of your internet service provider. This section will be filled up automatically and then you can move forward to the next step.
7.Set up your wireless signal
You can disable or enable the wireless signal that will be available in the wireless settings section at the top of the router’s menu. Here, you can set the encryption, change the network name or make changes in the wireless signal.
8.Apply your settings
Before moving onto the next step, you need to click the Apply or Save Changes button in the configuration settings of your router. Your new settings will now be saved, but you need to give it time for the changes to be saved.
- Place your router
Always remember to choose the best central location for your router. Obstacles, such as thick walls or doors, can cause issues in the connectivity, and therefore you need to think twice and try to put your router in the best place.
- Connect a device to the network
Once you have set up the router and chosen the best location, you can now connect a device to the network by scanning for wireless networks that are present at your place. Try scanning for new networks and then connect accordingly.
- Enter the password
Once you have enabled the WPA2 encryption, you will now have to enter the password in order to connect to the network. You can disable the hidden characters on a few systems, if you are using a private computer. This will help you to see the password that you are typing which makes it easier for you.
- Test your connection
Once you have entered the password and configured the settings, now you are all set to test your connection. You need to wait for a moment so that your connection appears. Now, open a web browser and then test your connection by visiting a website that you would not normally visit. If you have done everything correctly, the website should connect immediately!
These are the 12 steps to maximize your wireless network installation services. You can always call up your local technician if you are not confident, or are experiencing difficulties in setting up your wireless network installation services.
Feel free to contact us so that we can provide you with the best solutions and services. All you need to do is dial 1300 016 017 for further assistance.


